how to stay organized when working in collage
collaging invites chaos, here's my system for containing it
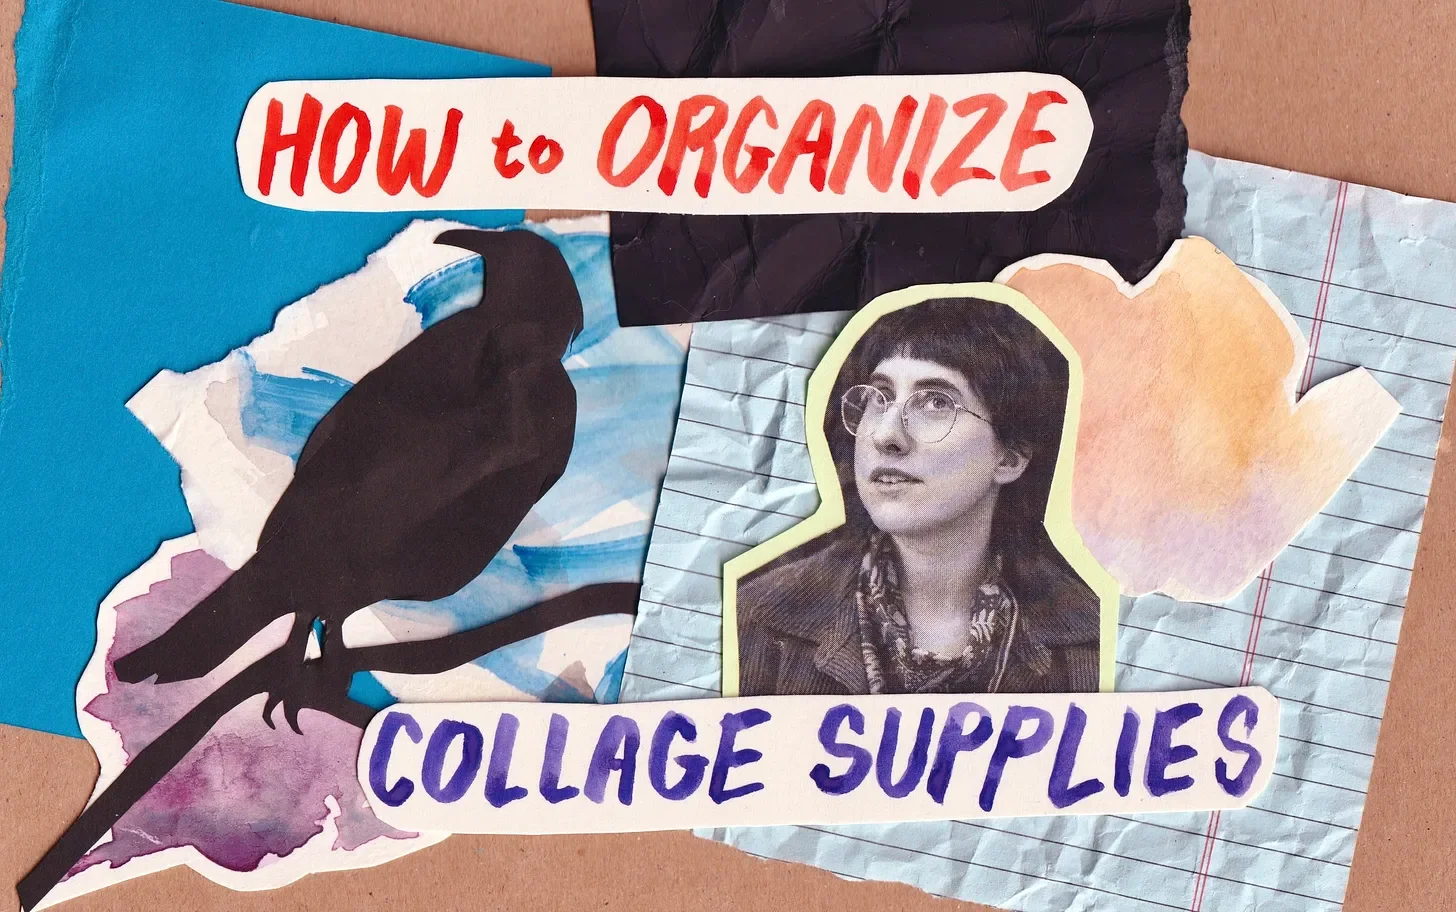
collage i made to support this post featuring a cutout of a raven and a photo of me looking up into the trees. it says “how to organize collage supplies”
This month I had the pleasure of teaching Collaging Your Uniquely Human Voice, a two-session class all about using physical materials and gentle digital cleanup to make flyers, posters, thumbnails, and other materials for how you show up online without ever touching ai.
That class is now available as a digital download for $59! You get access to both hour-long recordings and our secret Discord channel where you can share work and ask for feedback from me and the group. If the original time of Thursday mornings didn’t work for you, this is entirely self-guided experience will get you making things with your hands and feeling confident collaging your way.
One last announcement before I get into how to stay organized. Spots are now on sale for my Sketchbook Class, formally titled Start Drawing: Building a Compassionate Sketchbook Practice begins on March 28th at 9:00 AM PST!
Class runs for 4 weeks with three weeks of instruction and a break in-between to integrate, catch up, and practice sketching. I have been planning to teach this workshop for over a year and I’m so stoked that it had the highest waitlist signups to signal prioritizing it next month.
More details and tickets can be found here:
Prior to teaching a collage class, my materials were in a feral, disorganized box.
When I would collage, I rarely had a plan, but instead only a place where I would uncover and rediscover a plethora of materials I hoarded foraged for the purpose of making something later. Collage is a medium where my inner Raven and ADHD Goblin combine to take interesting detritus and make it into something worth looking at.
My laptop sits at my writing desk atop a bamboo easel I picked up years ago from IKEA. Inside it were disorganized and chaotic piles: cut scraps, wrinkled bits, paper pads, partially finished paintings, a box of crayons, scissors, tape, fun junk mail and other miscellany strewn about. This box functioned like a foraging basket, a place where I would hold onto treasures with a potential future use value.
Collaging was absolutely a feral rebellion for me. I wanted to throw away the idea of being a consistent brand. I wanted everything I put out in the world to be identifiably human, clearly not ai, and unlike what I had seen previously on sites like YouTube.
Common advice for designing thumbnails tells you to replicate and emulate what exists and is already successful. But I started to get more and more suspicious of this claim the further I got into my journey of making videos and putting them out there. The things that I make that are successful to a platform, more often than not function as distractions. I want an aligned audience, to find folks that I actually want to connect with, to find and relate to my work.
Collaging my thumbnails caused an initial dip in views but better connections on Discord and more students in my classes. The metrics we are given from platforms often only serve the platforms, not us, and not our people.
As qualitative improvements to my work and business were being revealed by this pivot, I saw more and more ai slop flooding YouTube and Substack. I would try to read an essay, only to realize “fuck, this person generated this image… and this one…” it made me immediately wonder, “did they generate the writing too?!”
I wanted to give people the benefit of the doubt and try to shift away from repulsion into an opportunity to teach people to use their hands and make things the old fashioned way. That meant, it was time to teach this collage process and put others on the path to authentic expression once again.
But there was one problem, the wild box of collage materials I was using wasn’t really replicable or accessible. I had to figure out a system that tamed that chaos and could be regularly maintained.
One of the biggest things I don’t see talked about enough in spaces around creativity and freelance work is the immense labor time that is spent on maintenance. Reorganizing our flat files, our paper piles, our physical inventory, and our digital spaces1 is a crucial part of my work. It’s the labor that lets us reflect, look back, and remember why we chose to do certain things, how much we’ve accomplished, and where we want to go next. It’s care work, which is likely why it is seen as less important or less visible.
I knew that in order to have a system that was easy to maintain, it needed to be simple with as few sub-categories as possible. So, here was the result:
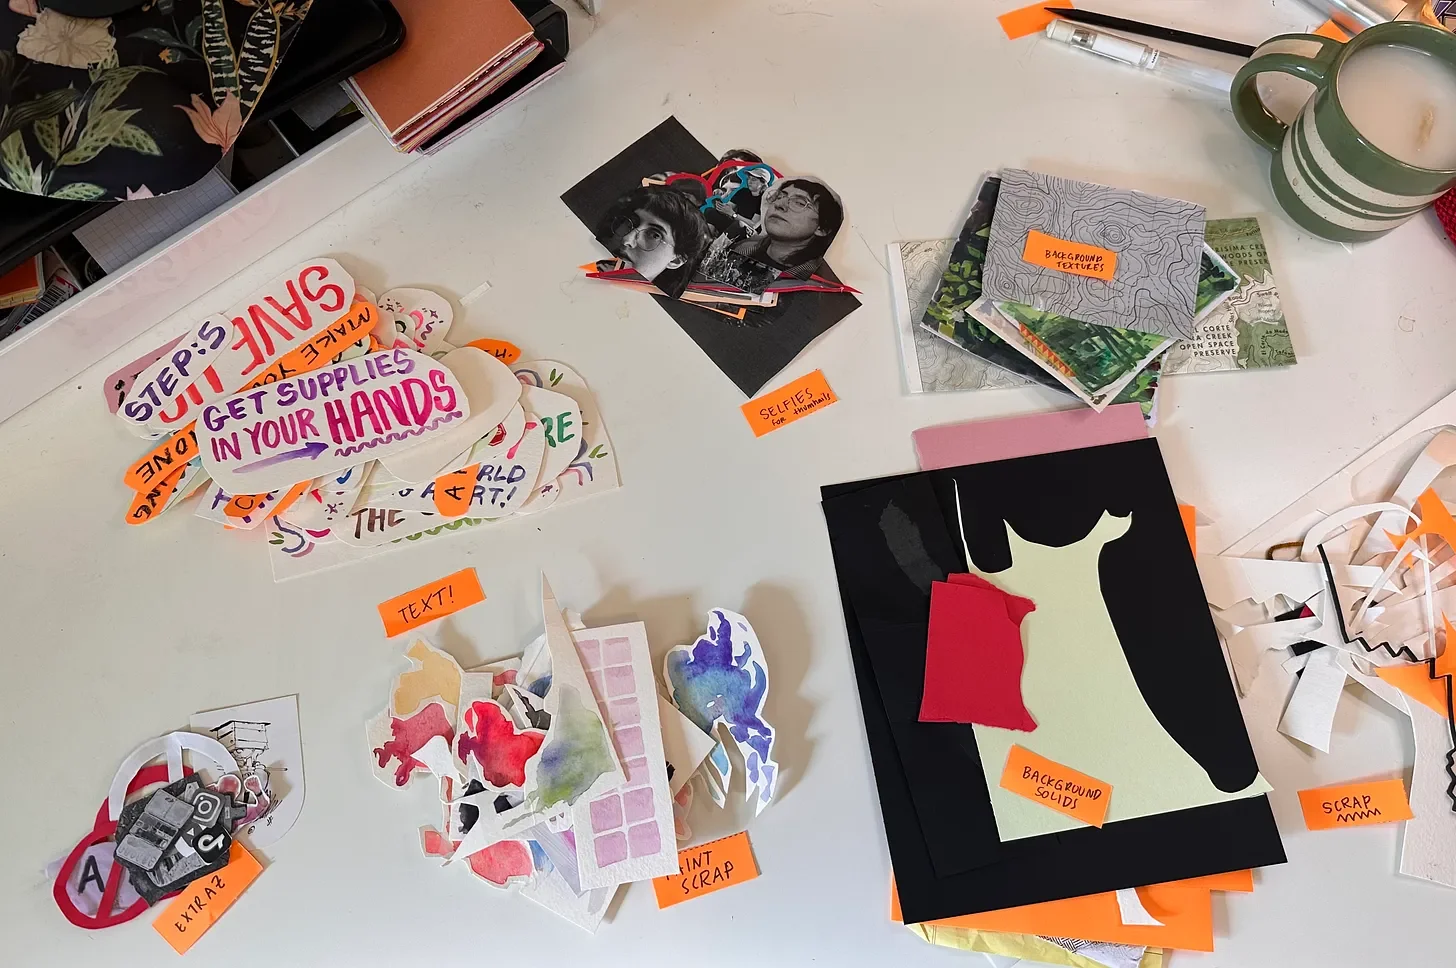
I pulled out all of the different objects I was using to collage with and sorted them on my desk first, instead of trying to organize them into a perfect system.
Because I work in an iterative process with collage — often changing a design several times — I use tape instead of glue stick to hold everything together. This makes it easy to reuse parts and printouts over and over. That also means that I have a tendency, like a Raven, to hold onto little treasures and scraps. Those scraps were the part making me the most frustrated when I would open my collage box, so taming them was essential to keep working like this long-term.
First I sorted by size.
Big pieces of paper, construction paper pads, backgrounds, and big textures were easiest to identify and pull out of the pile. Notepads, wrinkled papers, painted pieces, and trail maps all went in a new, neater pile, together. Eventually I sorted these into two separate categories: Backgrounds (neutral, flat, no added shadow in the scan) and Background Textures (wrinkled, painted, glittery, or otherwise textured pieces that added nice drop shadows to a scan)
Also in this category were old pieces of chipboard, the gorgeous textured brown paper that comes attached to pads of watercolor paper or notepads. Those would live in between, to separate each category, as they are what everything gets arranged on.
In the size-sorting process, I had to do something about all of the scrap I had floating around. I used several old envelopes, placed various sizes of scrap in them, and taped them shut! Paper scraps, when you are collaging are an essential supply. They let you add fun textures like I did in this post thumbnail:
But, little scraps of paper function like glitter in a classroom of kindergarteners — they get everywhere. Every time I vacuumed or moved furniture I found more and more tiny paper scraps. They would get caught on my cats paws as they walked across my desk2 and end up in every possible corner of my house and studio. Scraps are so fun, and uniquely human. They add neat points of emphasis, texture, and shadows. However, they are also a wild supply we need to do our best to contain them!
Once large and small supplies were accounted for, I sorted by category.
This was probably the most fun part of the process, figuring out generally what categories I use when making a thumbnail, flyer, or mini-poster out of scraps. The easiest of the categories to identify were the headshots/selfies that I use for YouTube thumbnails. Having a human face on something makes people stop to look at it, and yes, it is totally okay to reuse the exact same image of yourself over and over.
Last year I had some really rad photos taken in two of my favorite Bay Area biomes by the amazing Joy Newell, so those are the core images I pull from anytime I’m collaging. Does it matter that my hair has grown out a bit more and my glasses are a new shape? No! The goal of having these is to simply connect a stranger to the idea that I am in fact a person who made this video/essay/thing I put out on the Internet. Oddly, I think reusing the same picture actually helps the chance of someone clicking on a video on YouTube because they see a familiar face.
Next up was my text pile. I have been absolutely loving working with illustrated watercolor and crayon text. I had to make a few adjustments to my handwriting style — which I give tips for in the collage class if you wanna learn exactly how to do this yourself! I have a fun idea to start cutting out letters and building even more wacky and human parts to my collages, but overall I try to focus on keeping things around that are readable, the rest get recycled.
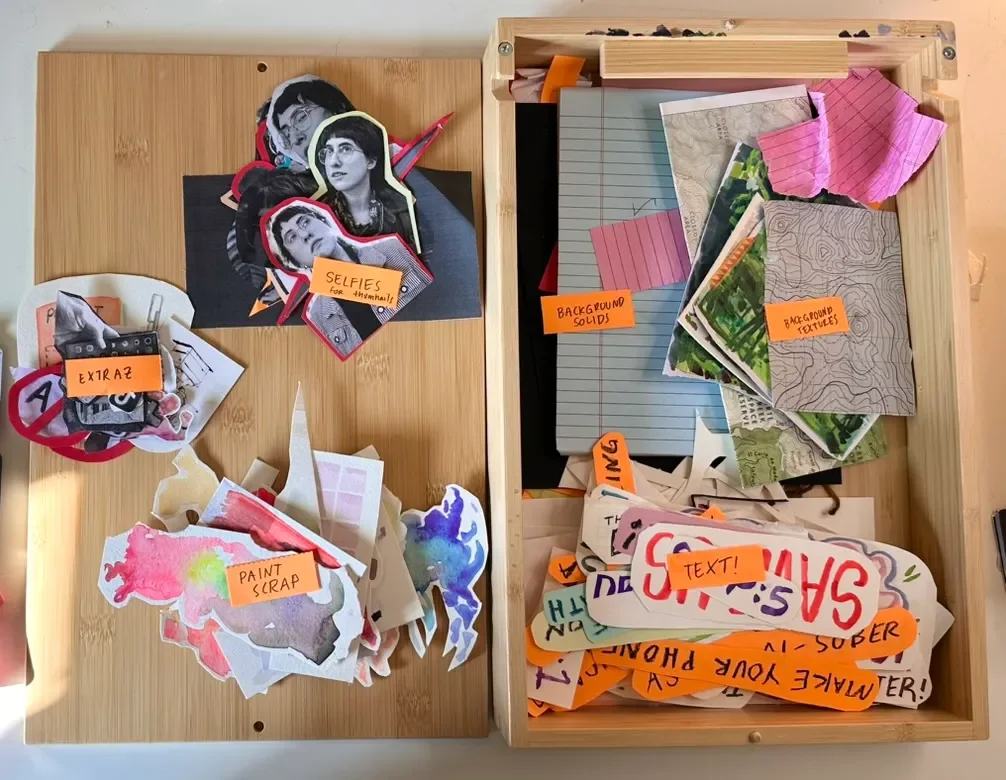
my collage box, organized and labeled! The result was so gratifying
Next up, I organized paint scraps, color experiments, and weird unfinished bits of watercolor paintings. In my gouache and watercolor class, I teach a practice of swatching to test different paint colors and opacities before you commit them to your piece. These scraps make excellent bookmarks to sell at markets but they are also real fun to use for guiding the direction of someone’s eye or making the background of an object more dynamic.
The final thing hanging around in a pile of its own were my “extras” like drawings of things, ripped up photos of phones, app logos, or symbols that reference the thing I am talking about in a video. This would be a good spot to have print outs of memes, cut outs of random people from your junk mail3, or other things you might want to reuse and remix.
two very excited men thinking about painting. These two were foraged from a piece of junk mail I received on selling a time share. I don’t have a time share, but I do love stock images of people dancing.
That is it for my organizing method!
Eventually, I will shift from this box into some sort of flat file organization as the process inevitably expands. For now, and for you, I say keep it simple and keep playing with whats possible. If you want some personalized support with figuring out how your system could work, or you want some direct feedback from me, book a tutoring session.
Until next time, stay creative and find your own ways to persistently bloom.